GA4のMCPサーバーをChatGPTに接続して、自然言語でGA4データを取得・分析できるようにする方法を解説します。Claude編の記事では、ローカル環境(stdio接続)での方法を紹介しましたが、ChatGPTではリモートHTTP接続(HTTPS + OAuth 2.0)が必須となります。本記事では、Google Cloud Runを使ったデプロイ手順を、非エンジニアの方でも再現できるよう画像付きで解説します。
ChatGPTとClaudeの違い
まず重要な点として、ChatGPTでMCPサーバーを利用するにはClaude編とは異なるアプローチが必要です。
| 項目 | Claude Desktop | ChatGPT |
|---|---|---|
| 接続方式 | ローカル(stdio) | リモートHTTP(HTTPS + OAuth 2.0) |
| サーバー設置 | ローカルPC上 | Cloud Run等のクラウド上 |
| 認証 | サービスアカウントキー | Google OAuth 2.0 |
| 必要プラン | 無料プランでもOK | Plus / Pro / Team以上 |
ChatGPTは「アプリ」という機能でMCPサーバーとの接続を提供しています。本手順書では、Streamable HTTPトランスポートとOAuth 2.0プロキシを使用してCloud Run上にサーバーをデプロイし、ChatGPTから接続します。
システム構成
本システムの全体像は以下の通りです。
ChatGPT → Cloud Run (http_server.py)
              ├─ /mcp          → StreamableHTTPSessionManager → GA4 MCP Server
              ├─ /authorize    → Google OAuth 2.0
              ├─ /token        → Google OAuth 2.0 (token exchange)
              ├─ /register     → Dynamic Client Registration
              └─ /.well-known/ → OAuth Discovery
主なコンポーネントは以下の4つです。
- http_server.py: OAuthプロキシ + MCPトランスポートの統合サーバー
- analytics_mcp: GA4 MCPサーバー本体(既存のOSS)
- Google Cloud Run: HTTPSエンドポイントのホスティング
- Google OAuth 2.0: 認証プロキシ(Googleアカウントでログイン)
前提条件
ChatGPTのプラン要件
| プラン | 対応状況 |
|---|---|
| 無料プラン | × 非対応 |
| Plus / Pro | ○ 対応 |
| Team | ○ 対応 |
| Business / Enterprise / Edu | ◎ 完全対応 |
必要なアカウント・環境
- Google Cloudプロジェクト(既存または新規作成)
- GA4プロパティへのアクセス権(閲覧者以上)
- Google Cloud SDK(gcloud CLI) — Cloud Runデプロイに必要
- Git — ソースコードのダウンロードに必要
- ChatGPT Plus / Pro / Team以上のアカウント
大まかな手順
- Google CloudでAPIの有効化
- OAuth同意画面の設定
- OAuthクライアントIDの作成
- ソースコードの準備(git clone + ファイル作成)
- Cloud Runへのデプロイ
- ChatGPTコネクターの登録
- 完了!
1. Google CloudでAPIの有効化
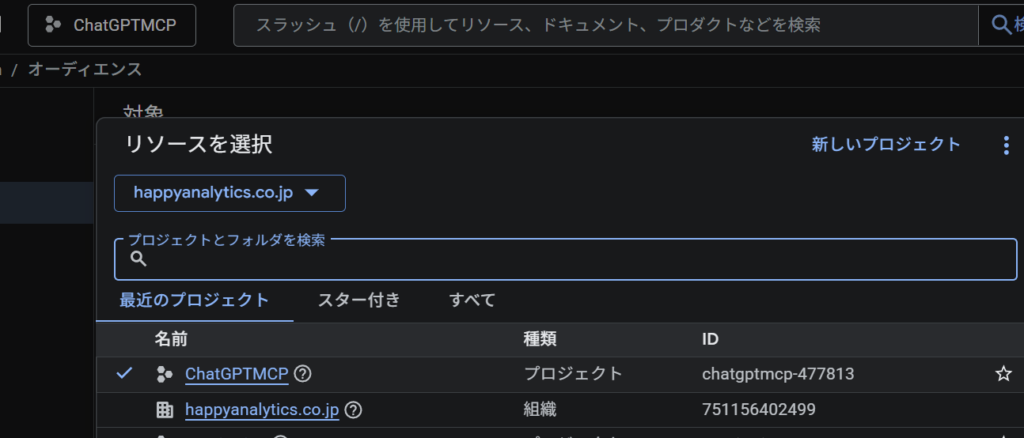
Google Cloud Consoleにログインし、対象のプロジェクトを選択します。Claude編で既にプロジェクトを作成済みの方は、そのプロジェクトをそのまま利用できます。あるいは新規にプロジェクトを作成してください。
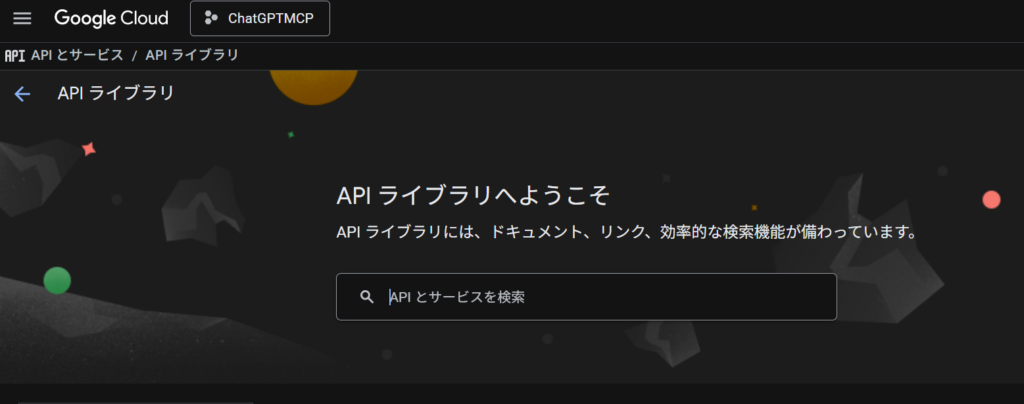
「APIとサービス」→「ライブラリ」を開き、以下の2つのAPIを検索して有効化します。
| API名 | 説明 |
|---|---|
| Google Analytics Admin API | GA4プロパティ情報や設定データにアクセス |
| Google Analytics Data API | GA4のレポートデータ(指標・ディメンション)を取得 |
2. OAuth同意画面の設定
「APIとサービス」→「OAuth同意画面」を開きます。
- ユーザータイプは「外部」を選択します
- アプリ名を入力します(例: GA4 MCP Server)
- サポートメールアドレスを入力します(例:Google Cloud Consoleにログインしているメールアドレス)
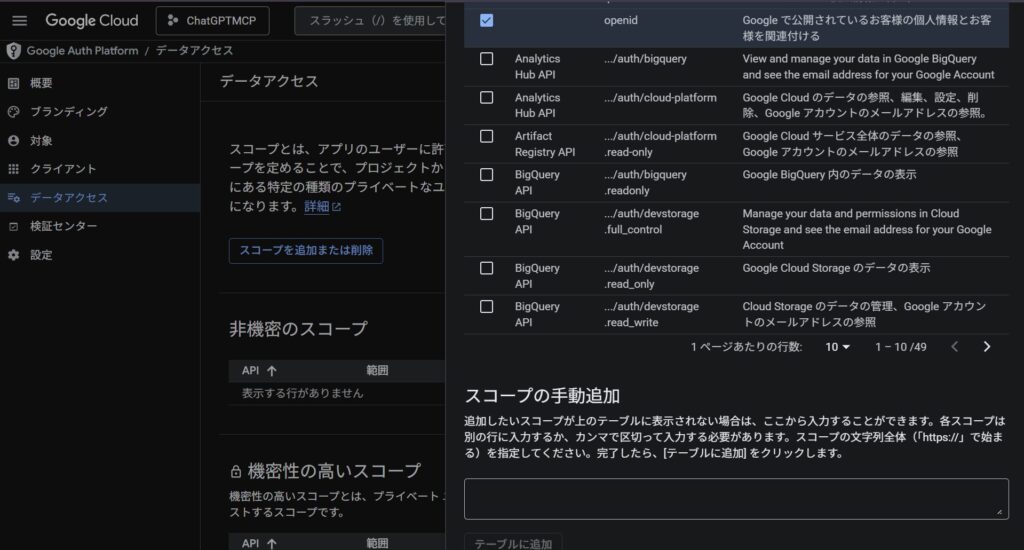
- 「データアクセス」内の「スコープを追加または削除」で以下を追加します:
openidemailhttps://www.googleapis.com/auth/analytics.readonly
※見つからない場合は、該当ページの下部にある「スコープの手動追加」から入力してください
3. OAuthクライアントIDの作成
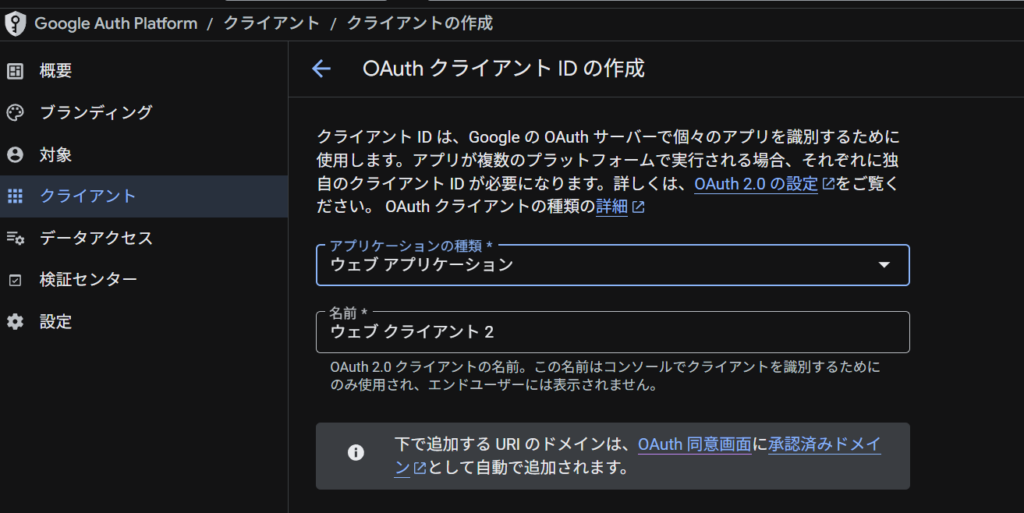
- 「クライアント」→「+クライアントを作成」を選択します
- アプリケーションの種類は「ウェブアプリケーション」を選択します
- 承認済みのリダイレクトURIは後ほど追加しますので、今はそのまま「作成」をクリックします
- 作成後に表示される以下の値をメモします:
- クライアントID(例: xxxx.apps.googleusercontent.com)
- クライアントシークレット(例: GOCSPX-xxxx)
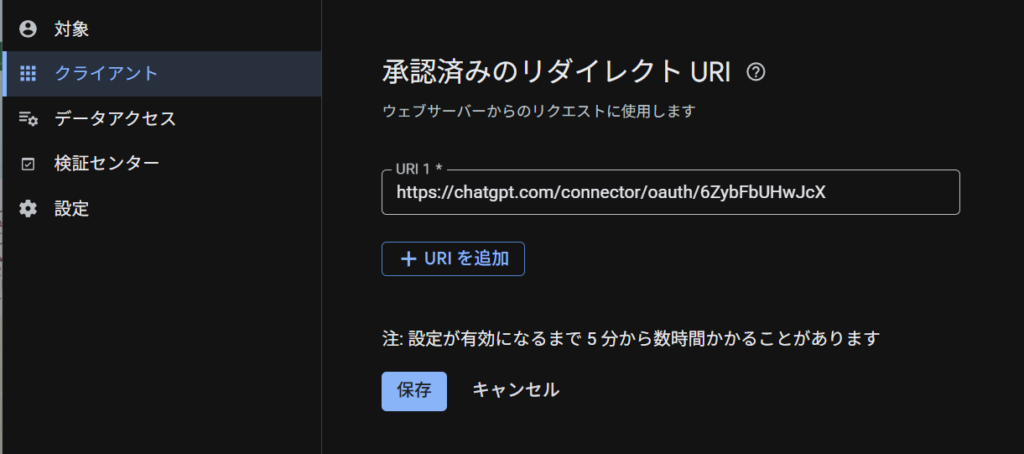
後述のSTEPでChatGPTでコネクターを作成すると、以下の形式のリダイレクトURIが生成されます:
https://chatgpt.com/connector/oauth/XXXXXXXXXこのURIをGoogle Cloud Consoleの「承認済みのリダイレクトURI」に追加する必要があります。コネクターを再作成するとURIが変わるため、その都度追加が必要です。
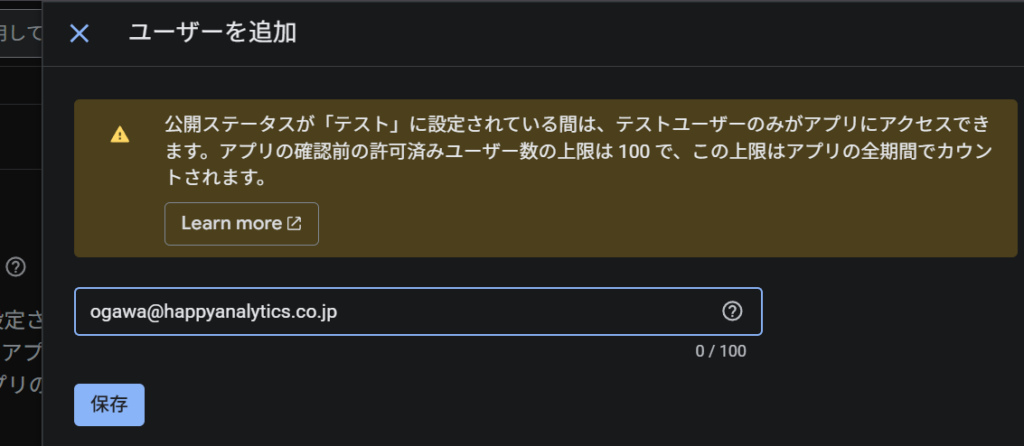
テストユーザーの追加
OAuth同意画面が「テスト」ステータスの場合、アクセスできるユーザーを明示的に追加する必要があります。「対象」→「テストユーザー」セクションを開き、GA4にアクセスするユーザーのGoogleアカウントを追加します。
本番運用する場合は、OAuth同意画面を「本番環境に公開」することで、テストユーザーの制限がなくなります。
4. ソースコードの準備
4.1 GA4 MCPサーバーのクローン
まず、GA4 MCPサーバーのリポジトリをクローンします。PowerShellまたはターミナルで以下を実行します:
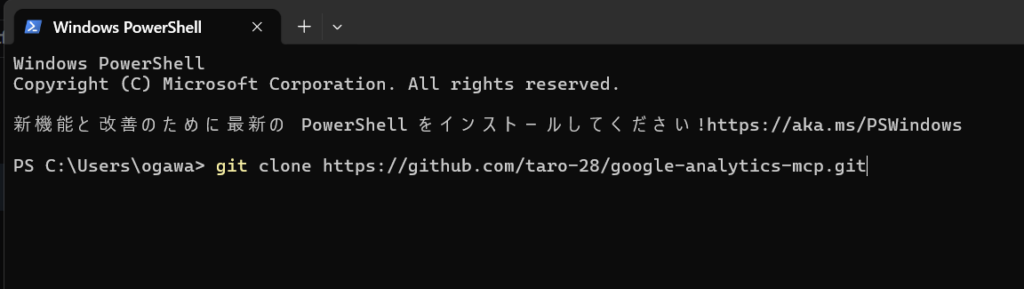
git clone https://github.com/taro-28/google-analytics-mcp.git
cd google-analytics-mcp
事前準備: 必要なソフトウェアのインストール
まだインストールしていない場合は、以下を先に準備してください。
| ソフトウェア | ダウンロード先 | 確認コマンド |
| Node.js(v18以上) | https://nodejs.org/ | node –version |
| Git | https://git-scm.com/ | git –version |
上記のダウンロード先からインストール後、ターミナルで確認コマンドを実行し、バージョン番号が表示されればOKです。
4.2 http_server.pyの作成
プロジェクトのルートディレクトリ(google-analytics-mcp内)に http_server.py を作成します。このファイルが、OAuthプロキシとMCPトランスポートの両方を担う統合サーバーです。
ファイルの主な役割:
- OAuthエンドポイント: Google OAuthへのプロキシ(/authorize, /token)
- OAuthディスカバリ: .well-knownエンドポイント
- ダイナミッククライアント登録: /registerエンドポイント
- MCPトランスポート: /mcpエンドポイント(Streamable HTTP)
- ChatGPT互換性レイヤー: ヘッダー修正、プローブ応答
メモ帳を開いて以下の内容をそのままコピーし、http_server.pyとして保存してください。
import os
import json
import uuid
import urllib.request
import urllib.parse
import logging
import contextlib

import uvicorn
from starlette.applications import Starlette
from starlette.routing import Route
from starlette.requests import Request
from starlette.responses import JSONResponse, RedirectResponse

logging.basicConfig(level=logging.INFO)
logger = logging.getLogger(__name__)

GOOGLE_CLIENT_ID = os.environ.get("GOOGLE_CLIENT_ID", "")
GOOGLE_CLIENT_SECRET = os.environ.get("GOOGLE_CLIENT_SECRET", "")
SERVICE_URL = os.environ.get("SERVICE_URL", "")

# ============================================================
# OAuth Endpoints
# ============================================================
async def oauth_protected_resource(request: Request):
    base = (SERVICE_URL or str(request.base_url)).rstrip("/")
    return JSONResponse({
        "resource": base,
        "authorization_servers": [base],
    })

async def oauth_server_metadata(request: Request):
    base = (SERVICE_URL or str(request.base_url)).rstrip("/")
    return JSONResponse({
        "issuer": base,
        "authorization_endpoint": f"{base}/authorize",
        "token_endpoint": f"{base}/token",
        "registration_endpoint": f"{base}/register",
        "response_types_supported": ["code"],
        "grant_types_supported": ["authorization_code", "refresh_token"],
        "token_endpoint_auth_methods_supported": ["client_secret_post", "client_secret_basic"],
        "code_challenge_methods_supported": ["S256"],
    })

async def openid_configuration(request: Request):
    base = (SERVICE_URL or str(request.base_url)).rstrip("/")
    return JSONResponse({
        "issuer": base,
        "authorization_endpoint": f"{base}/authorize",
        "token_endpoint": f"{base}/token",
        "registration_endpoint": f"{base}/register",
        "response_types_supported": ["code"],
        "grant_types_supported": ["authorization_code", "refresh_token"],
        "token_endpoint_auth_methods_supported": ["client_secret_post", "client_secret_basic"],
        "code_challenge_methods_supported": ["S256"],
    })

clients_db = {}

async def register(request: Request):
    body = await request.json()
    client_id = str(uuid.uuid4())
    client_secret = str(uuid.uuid4())
    clients_db[client_id] = {
        "client_secret": client_secret,
        "redirect_uris": body.get("redirect_uris", []),
    }
    logger.info(f"Registered client: {client_id}")
    return JSONResponse({
        "client_id": client_id,
        "client_secret": client_secret,
        "redirect_uris": body.get("redirect_uris", []),
    })

async def authorize(request: Request):
    params = dict(request.query_params)
    google_auth_url = "https://accounts.google.com/o/oauth2/v2/auth?" + urllib.parse.urlencode({
        "client_id": GOOGLE_CLIENT_ID,
        "redirect_uri": params.get("redirect_uri", ""),
        "response_type": "code",
        "scope": "openid email https://www.googleapis.com/auth/analytics.readonly",
        "state": params.get("state", ""),
        "access_type": "offline",
        "prompt": "consent",
    })
    return RedirectResponse(google_auth_url)

async def token(request: Request):
    body = await request.body()
    form = dict(urllib.parse.parse_qs(body.decode()))
    form = {k: v[0] if isinstance(v, list) else v for k, v in form.items()}
    grant_type = form.get("grant_type", "authorization_code")

    if grant_type == "refresh_token":
        google_data = urllib.parse.urlencode({
            "refresh_token": form.get("refresh_token", ""),
            "client_id": GOOGLE_CLIENT_ID,
            "client_secret": GOOGLE_CLIENT_SECRET,
            "grant_type": "refresh_token",
        }).encode()
    else:
        google_data = urllib.parse.urlencode({
            "code": form.get("code", ""),
            "client_id": GOOGLE_CLIENT_ID,
            "client_secret": GOOGLE_CLIENT_SECRET,
            "redirect_uri": form.get("redirect_uri", ""),
            "grant_type": "authorization_code",
        }).encode()

    req = urllib.request.Request(
        "https://oauth2.googleapis.com/token",
        data=google_data,
        method="POST",
    )
    req.add_header("Content-Type", "application/x-www-form-urlencoded")

    try:
        with urllib.request.urlopen(req) as resp:
            token_resp = json.loads(resp.read())
        return JSONResponse(token_resp)
    except urllib.error.HTTPError as e:
        error_body = e.read().decode()
        return JSONResponse(json.loads(error_body), status_code=e.code)

# ============================================================
# MCP Transport Setup
# ============================================================
session_manager = None
lifespan_cm = None

try:
    from mcp.server.streamable_http_manager import StreamableHTTPSessionManager
    import analytics_mcp.coordinator as coordinator

    session_manager = StreamableHTTPSessionManager(
        app=coordinator.app,
        json_response=True,
        stateless=True,
    )

    @contextlib.asynccontextmanager
    async def _lifespan(app):
        async with session_manager.run():
            logger.info("Streamable HTTP session manager started")
            yield

    lifespan_cm = _lifespan
except Exception as e:
    logger.warning(f"Streamable HTTP setup failed ({e})")

# ============================================================
# Starlette App (OAuth routes only)
# ============================================================
inner_app = Starlette(
    routes=[
        Route("/.well-known/oauth-protected-resource", oauth_protected_resource),
        Route("/.well-known/oauth-authorization-server", oauth_server_metadata),
        Route("/.well-known/openid-configuration", openid_configuration),
        Route("/register", register, methods=["POST"]),
        Route("/authorize", authorize),
        Route("/token", token, methods=["POST"]),
    ],
    lifespan=lifespan_cm,
)

# ============================================================
# Top-level ASGI App
# ============================================================
async def send_json_response(send, status, body_dict, extra_headers=None):
    body = json.dumps(body_dict).encode()
    headers = [
        (b"content-type", b"application/json"),
        (b"content-length", str(len(body)).encode()),
    ]
    if extra_headers:
        headers.extend(extra_headers)
    await send({"type": "http.response.start", "status": status, "headers": headers})
    await send({"type": "http.response.body", "body": body})

async def app(scope, receive, send):
    if scope["type"] == "lifespan":
        await inner_app(scope, receive, send)

    elif scope["type"] == "http" and scope["path"] in ("/mcp", "/mcp/"):
        method = scope.get("method", "GET")
        raw_headers = list(scope.get("headers", []))
        cl_value = None
        for k, v in raw_headers:
            if k == b"content-length":
                cl_value = v
                break
        cl_int = int(cl_value) if cl_value else 0

        # Handle GET probe
        if method == "GET":
            await send_json_response(send, 200, {
                "name": "google-analytics-mcp",
                "version": "0.1.0",
                "protocol": "mcp",
            })
            return

        # Handle empty POST probe
        if method == "POST" and cl_int == 0:
            await receive()
            await send_json_response(send, 200, {
                "jsonrpc": "2.0",
                "result": {"name": "google-analytics-mcp", "version": "0.1.0"},
                "id": None,
            })
            return

        if not session_manager:
            await send_json_response(send, 503, {"error": "MCP not available"})
            return

        # Fix headers for ChatGPT compatibility
        new_headers = []
        has_accept = False
        for key, value in raw_headers:
            if key == b"content-type" and b"application/json" not in value:
                new_headers.append((key, b"application/json"))
            elif key == b"accept":
                has_accept = True
                if b"application/json" not in value and b"text/event-stream" not in value:
                    new_headers.append((key, b"application/json, text/event-stream"))
                else:
                    new_headers.append((key, value))
            else:
                new_headers.append((key, value))
        if not has_accept:
            new_headers.append((b"accept", b"application/json, text/event-stream"))

        fixed_scope = dict(scope)
        fixed_scope["headers"] = new_headers
        await session_manager.handle_request(fixed_scope, receive, send)

    elif scope["type"] == "http" and scope["path"] in ("/", ""):
        await send_json_response(send, 200, {
            "name": "google-analytics-mcp",
            "version": "0.1.0",
            "status": "ok",
        })
    else:
        await inner_app(scope, receive, send)

if __name__ == "__main__":
    port = int(os.environ.get("PORT", "8080"))
    uvicorn.run(app, host="0.0.0.0", port=port)
4.3 Dockerfileの作成
プロジェクトのルートディレクトリ(google-analytics-mcp内)に以下の内容で Dockerfile を作成します。メモ帳を開いて貼り付けを行い、拡張子無しで保存してください。
FROM python:3.11-slim

ENV PYTHONUNBUFFERED=1
WORKDIR /app
COPY . .

RUN pip install --upgrade pip \
    && pip install -e . \
    && pip install uvicorn starlette "mcp>=1.8.0"

EXPOSE 8080
CMD ["python", "http_server.py"]
4.4 ディレクトリ構造の確認
ファイル作成後のディレクトリ構造は以下のようになります:
google-analytics-mcp/
├── http_server.py          ← 新規作成
├── Dockerfile              ← 新規作成
├── pyproject.toml          ← 既存(クローン済み)
├── analytics_mcp/
│   ├── coordinator.py      ← MCPサーバー本体
│   ├── tools/
│   └── ...
└── ...
5. Cloud Runへのデプロイ
5.1 gcloud CLIのセットアップ
まだgcloud CLIをインストールしていない場合は、こちらからインストールします。
インストール後、PowerShellまたはターミナルで以下を実行して認証を行います:
gcloud auth login
gcloud config set project YOUR_PROJECT_IDGoogle Cloudのプロジェクト一覧から確認できる、英語や数値の文字列がプロジェクトIDです。
5.2 デプロイコマンド
PowerShellまたはターミナルでプロジェクトのルートディレクトリにて以下を実行します。クライアントIDとクライアントシークレットはSTEP3で取得した内容に置き換えてください:
gcloud run deploy ga4-mcp \
  --source . \
  --region=us-central1 \
  --allow-unauthenticated \
  --set-env-vars=\
    GOOGLE_CLIENT_ID=「クライアントID」,\
    GOOGLE_CLIENT_SECRET=「クライアントシークレット」,\
SERVICE_URL=「デプロイ後のURL」初回デプロイ時はSERVICE_URLがまだわからないため、空のままデプロイします。デプロイ後に表示されるURLを確認し、再デプロイで設定します。
例:
https://ga4-mcp-xxxx.us-central1.run.app5.3 デプロイ後の確認
デプロイが成功すると、以下のようなURLが表示されます:
Service URL: https://ga4-mcp-xxxx.us-central1.run.appブラウザでアクセスして、以下のJSONが表示されることを確認します:
{"name":"google-analytics-mcp","version":"0.1.0","status":"ok"}5.4 SERVICE_URLを設定して再デプロイ
表示されたURLをSERVICE_URLに設定して再デプロイします:
gcloud run deploy ga4-mcp \
  --source . \
  --region=us-central1 \
  --allow-unauthenticated \
  --set-env-vars=\
    GOOGLE_CLIENT_ID=「クライアントID」,\
    GOOGLE_CLIENT_SECRET=「クライアントシークレット」,\
    SERVICE_URL=https://ga4-mcp-xxxx.us-central1.run.app
6. ChatGPTコネクターの登録
6.1 コネクターの作成
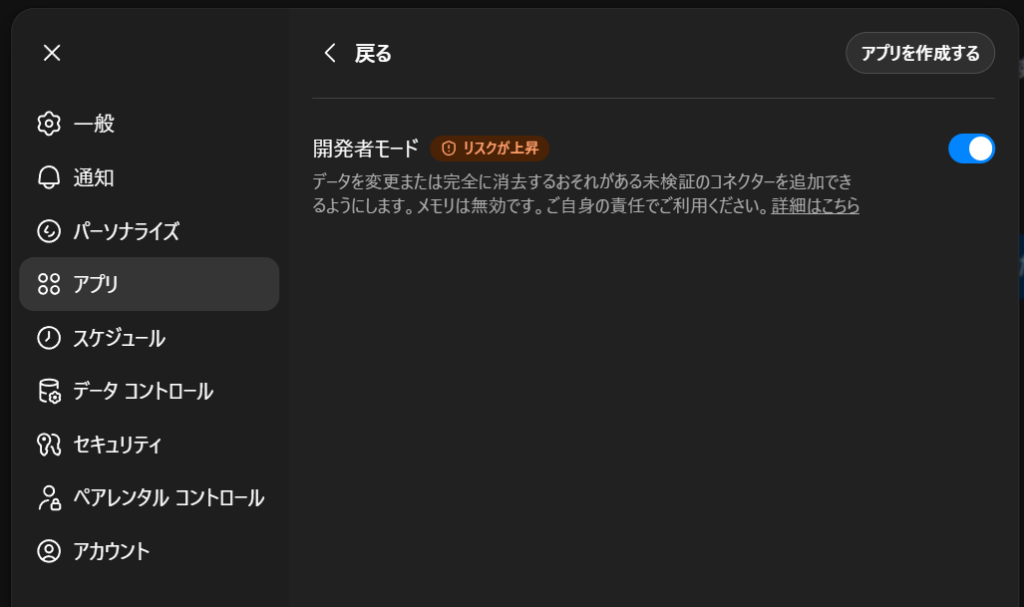
- ChatGPTの「設定」画面を開きます
- 「アプリ」セクションを選択します
- 「高度な設定」から「開発者」モードをONにします
- 「高度な設定」から「アプリを作成する」をクリックします
- 以下の情報を入力します:
| 項目 | 入力値 |
|---|---|
| URL | https://ga4-mcp-xxxx.us-central1.run.app/mcp ※前ステップで発行されたSERVICE_URLを利用。最後に/mcpをつけましょう |
| Name | 任意の名前(例: GA4 Analytics) |
| 説明 | 任意の説明 |
| 認証 | OAuth |
| 理解したうえで、続行します | チェックを入れる |
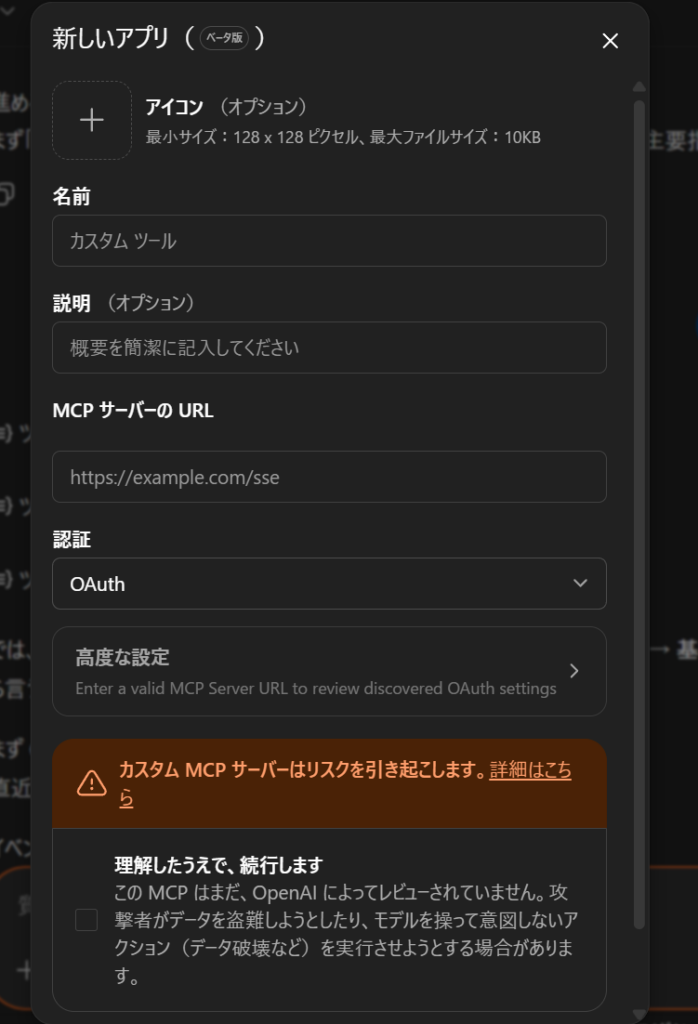
「作成する」をクリックします。
6.2 リダイレクトURIの登録
コネクターを保存すると、GoogleのOAuth認証画面が表示されます。
redirect_uri_mismatchエラーが出た場合は以下の手順で対処します:
- エラーメッセージに含まれる
redirect_uriの値を確認します
(例:https://chatgpt.com/connector/oauth/6ZybFbUHwJcX)
※わからない場合は生成AIに該当URLをコピーして確認してください - このURIをGoogle Cloud Consoleの「承認済みのリダイレクトURI」に追加してください
- 追加後、ChatGPTでコネクターの「Connect」ボタンを再度クリックします
- Googleアカウントでログインします
- アクセス許可の確認画面で「許可」をクリックします
- 接続が成功すると、ChatGPTの設定画面にコネクターが表示されます
利用する際には「+」ボタンを押して追加したアプリを選択の上、プロンプトを入れてください。
ChatGPTのチャット画面で、以下のように質問してみましょう:
「GA4で利用可能なツールを一覧表示してください」
ツール一覧が表示されれば、接続は正常です。
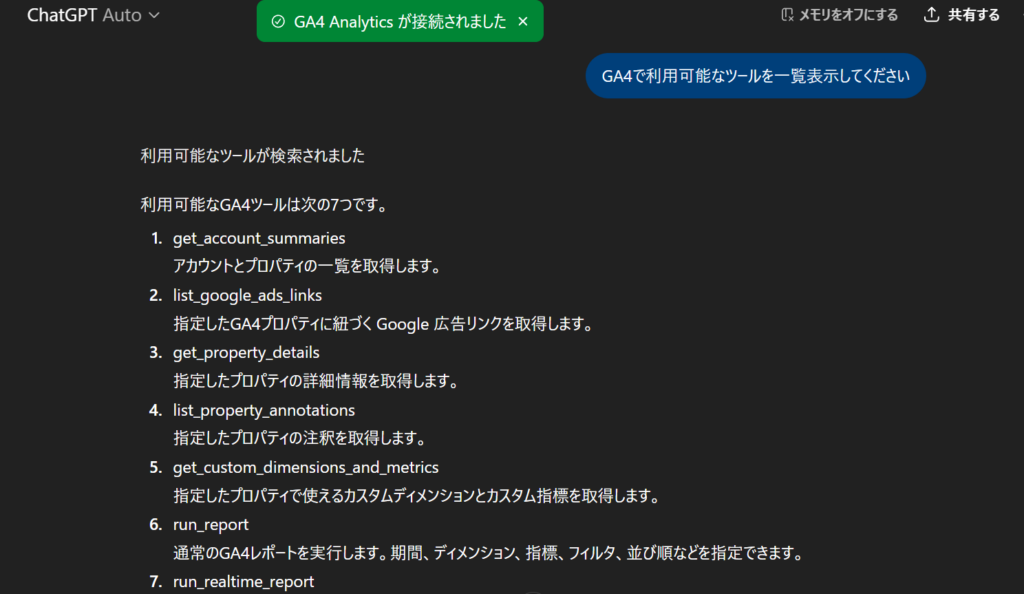
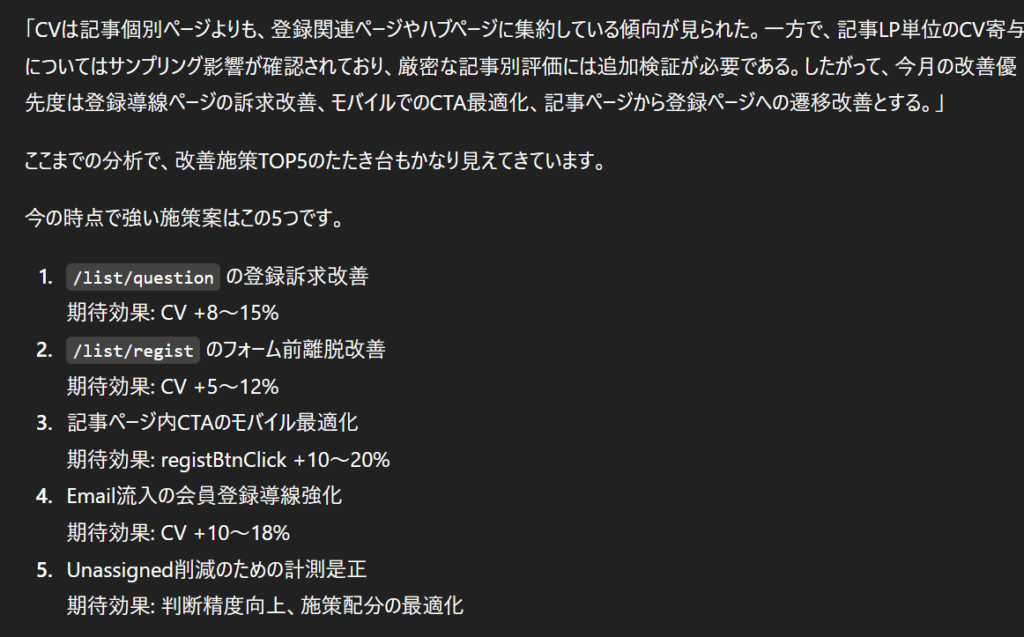
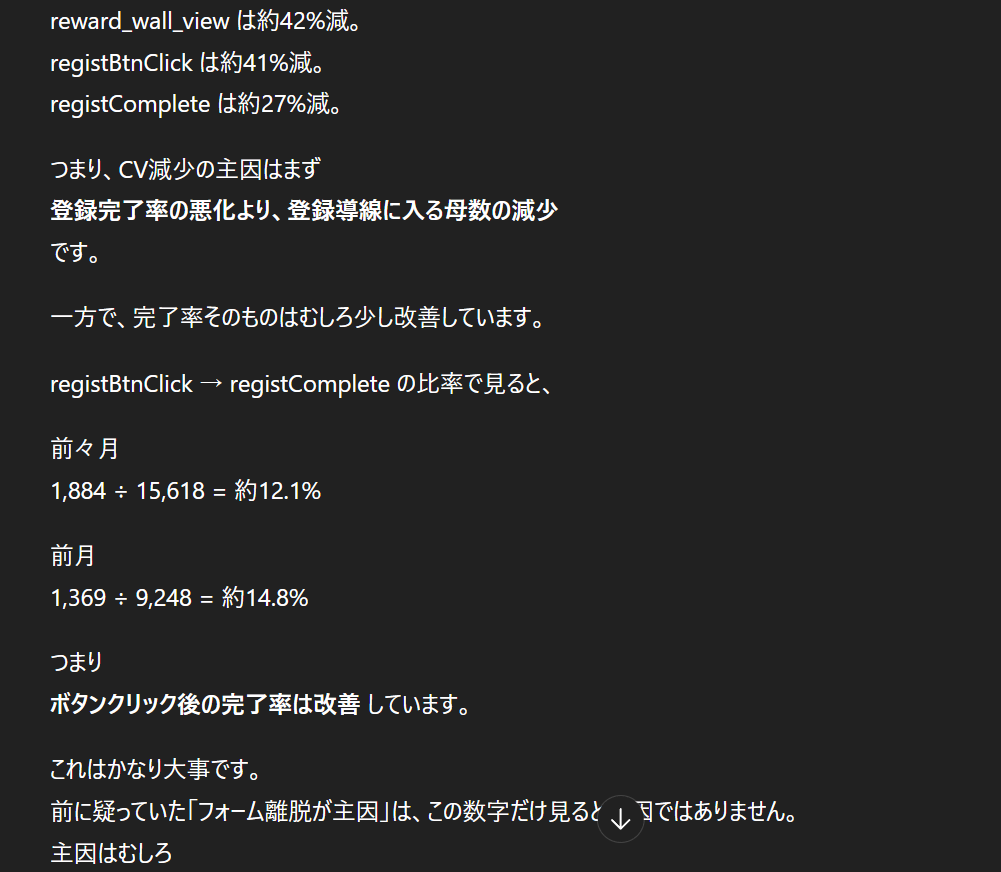
いくつかアウトプットの例を紹介しておきます。
7. トラブルシューティング
「Unsafe URL」エラー
コネクター作成時に「Unsafe URL」と表示される場合、ChatGPTがサーバーの検証に失敗しています。
| 原因 | 説明 | 解決策 |
|---|---|---|
| 307リダイレクト | /mcpが/mcp/にリダイレクトされる | ASGIレベルでルーティング(http_server.pyで対応済み) |
| 400 Bad Request | Content-Typeが不正 | ヘッダー自動修正(http_server.pyで対応済み) |
| 406 Not Acceptable | Acceptヘッダーが不正 | ヘッダー自動修正(http_server.pyで対応済み) |
| GET / が404 | ルートURLにハンドラがない | ルートハンドラ追加(http_server.pyで対応済み) |
| URLがフラグされた | 繰り返しのエラーで永久ブロック | 新しいサービス名で再デプロイ |
ChatGPTは、繰り返しエラーが発生したURLを永久的に「Unsafe URL」としてフラグすることがあります。この場合、新しいサービス名でデプロイすることで解決できます:
gcloud run deploy ga4-mcp-v2 --source . ...新しいURLが発行され、問題が解消されます。
redirect_uri_mismatchエラー
GoogleのOAuth認証画面でこのエラーが表示される場合:
- エラーメッセージ内の
redirect_uriの値を確認します - Google Cloud Console →「認証情報」→ 対象のOAuthクライアントIDを編集
- 「承認済みのリダイレクトURI」に該当URIを追加
- 保存後、ChatGPTでコネクターを再接続
デプロイログの確認方法
問題が発生した場合、Cloud Runのログを確認します:
gcloud run services logs read ga4-mcp --region=us-central1 --limit=50または、Google Cloud Consoleの「Cloud Run」→ 対象サービス →「ログ」タブでも確認できます。該当ログを生成AIに渡して解決方法を探していきましょう。
最後に
今回はGA4のMCPサーバーをChatGPTに接続する方法を紹介しました。Claude編と比較すると、Cloud RunへのデプロイやOAuth設定など手順は多くなりますが、一度セットアップすればChatGPTから直接GA4データにアクセスして分析が行えるようになります。
ChatGPTの場合はクラウド上にサーバーを設置するため、デスクトップアプリが不要で、ブラウザからいつでもアクセスできるのがメリットです。Claude編と合わせて、お好みのAIサービスでGA4分析をお試しください。